Use this guide as a working method, not a list of tricks. Read one section, apply it to a real activity, and keep the evidence that shows why each move works.
The short answer
Hard Sudoku still requires proof for every placement. Maintain accurate candidates, exhaust singles and locked candidates, then move through pairs, triples and line patterns only when their exact conditions appear.
When progress stops, audit notes before seeking a rarer technique. One stale candidate can hide a simple placement or create a false advanced pattern.
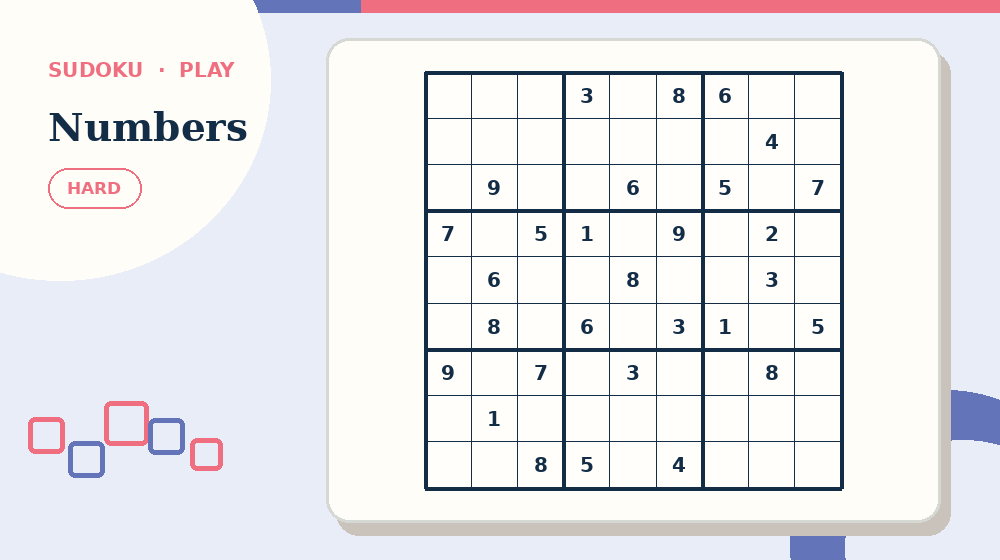
Before continuing, open Hard Sudoku and practise this first move: validate every candidate note and exhaust naked and hidden singles first, because an advanced pattern built on stale notes is invalid and a missed single wastes the strongest information already available. The complete activity makes the setup advice above easier to judge than an isolated example.
Record eliminations separately from placements and verify every affected peer. Guessing may finish a grid but does not establish a reliable solve.
Understand the exact job of this activity
In How to Solve Hard Sudoku Without Guessing, success means you can replace trial-and-error with a disciplined elimination ladder that finds the next justified move in a hard Sudoku and turns advanced patterns into simpler follow-up placements. The relevant evidence is the digits already present in the same row, column and box, together with the candidates those digits eliminate. Decoration, familiarity with the theme and confidence are not evidence by themselves.
Use one cell together with its row, column and 3×3 box to keep the decision local. Start by doing this: validate every candidate note and exhaust naked and hidden singles first, because an advanced pattern built on stale notes is invalid and a missed single wastes the strongest information already available. If you cannot name what changed, do not add another permanent answer or mark.
Measure progress by this standard: count justified placements and cleaned candidate sets rather than elapsed time alone. When progress stops, return to this method: inspect rows, columns and boxes for naked or hidden pairs and triples, treating the reserved digits as a set and eliminating them only from other cells in the exact unit that proves the subset. State the reason for changing approach before you make the next move.
Prepare the materials and the decision record
For How to Solve Hard Sudoku Without Guessing, lay out a hard Sudoku with accurate givens, complete candidate notes, an erasable or reversible input method and enough time to scan the full grid systematically instead of guessing at one crowded cell. Keep any answer material closed or out of reach until the attempt has a complete result or a precisely stated question.
On paper, write candidates in consistent miniature positions and erase obsolete notes before they become clutter. On screen, select a cell, use notes for candidates and recheck highlighted peers after a placement. Check the real input method before starting so a print, zoom or touch problem is not mistaken for puzzle difficulty.
Record uncertain work this way: place a large digit only when the three units rule out every alternative; keep candidates small. If intermediate Sudoku players who can solve easy and medium grids but stall when obvious singles disappear pause and return later, the record should show what is confirmed, what is provisional and what was rejected.
- Goal: replace trial-and-error with a disciplined elimination ladder that finds the next justified move in a hard Sudoku and turns advanced patterns into simpler follow-up placements.
- First action: validate every candidate note and exhaust naked and hidden singles first, because an advanced pattern built on stale notes is invalid and a missed single wastes the strongest information already available.
- Working unit: one cell together with its row, column and 3×3 box.
- Final check: scan every row, column and box for duplicates, then compare the finished grid with the recorded solution.
Work through a hard-grid cycle
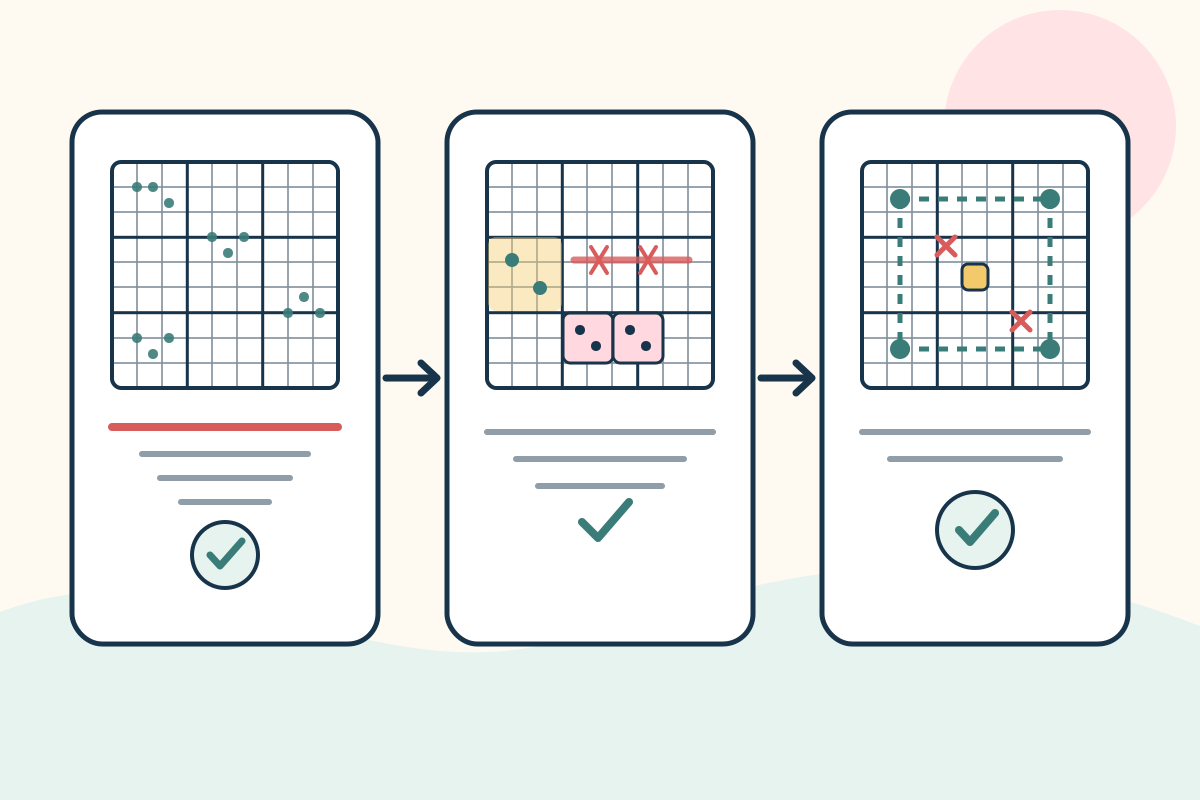
Step 1 - Scan naked and hidden singles across all 27 units and update peers immediately.
Step 2 - Map one digit through boxes and lines for locked candidates. Apply only eliminations supported by the shared unit.
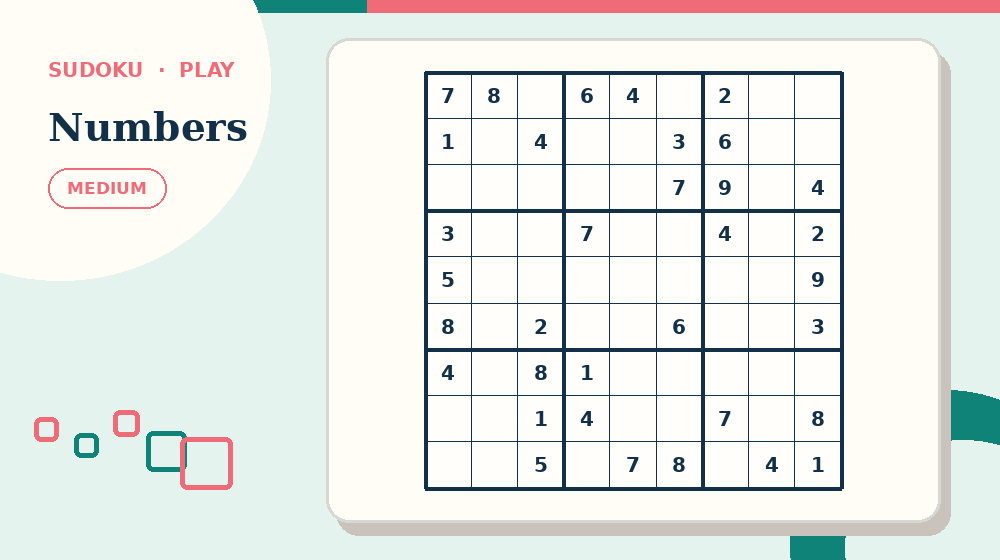
Use Medium Sudoku for the next pass. Try to scan each three-by-three box for locked candidates, including pointing and claiming relationships, and remove a digit from peers only when its remaining positions are confined to the required shared row or column without opening the answer material, then return here and name the evidence that supported the decision.
Step 3 - Scan for naked or hidden pairs and triples, writing the exact cells and digits before erasing notes.
Step 4 - If no progress remains, test line patterns such as X-Wing for one digit at a time.
Step 5 - After any elimination, return to singles and simpler techniques. Advanced patterns often create an easy next move.
Worked example: advanced elimination creates a single
Suppose a valid X-Wing removes candidate 7 from two cover-column cells. Record the base rows and cover columns before editing.
One changed cell now contains only 4. Place 4 as the consequence of a naked single, not as part of the X-Wing.
Update the row, column and box receiving 4, then restart the ladder from singles. Do not continue hunting X-Wings automatically.
Decision log for the hard-grid elimination
Record the X-Wing source separately: selected digit, base rows, cover columns and the two candidates removed. Preserve the candidate map before editing.
Log the resulting naked single 4 as a new step with its cell and remaining candidate set. Do not label the placement itself as an X-Wing.
After updating peers, note which simple technique becomes available next. This dependency chain lets another solver audit the advanced elimination without replaying the entire puzzle.
Diagnostic questions for How to Solve Hard Sudoku Without Guessing
Can you explain why validate every candidate note and exhaust naked and hidden singles first, because an advanced pattern built on stale notes is invalid and a missed single wastes the strongest information already available is the correct opening for how to solve hard sudoku? If not, restate the goal - replace trial-and-error with a disciplined elimination ladder that finds the next justified move in a hard Sudoku and turns advanced patterns into simpler follow-up placements - before making another mark.
Does the current record follow this rule: place a large digit only when the three units rule out every alternative; keep candidates small? If not, separate confirmed work from possibilities before the next method.
Which evidence supports the current decision: the digits already present in the same row, column and box, together with the candidates those digits eliminate? Remove any answer supported only by familiarity or appearance.
Have you checked for this specific failure: searching for X-Wings or other advanced patterns before candidates are complete and simpler locked-candidate or pair eliminations have been exhausted? Repair that issue locally instead of restarting unrelated work.
Can the final result pass this test: scan every row, column and box for duplicates, then compare the finished grid with the recorded solution? If not, leave the activity marked as unfinished and record the exact failing unit.
Adjust difficulty without changing the core skill
For an easier sudoku activity, reduce clue count, candidate density, the solving techniques required and how many logical steps must be chained together while preserving the goal to replace trial-and-error with a disciplined elimination ladder that finds the next justified move in a hard Sudoku and turns advanced patterns into simpler follow-up placements. Keep the same opening method: validate every candidate note and exhaust naked and hidden singles first, because an advanced pattern built on stale notes is invalid and a missed single wastes the strongest information already available.
For a harder how to solve hard sudoku task, add one source of complexity at a time. Continue to require this evidence: the digits already present in the same row, column and box, together with the candidates those digits eliminate. More decoration, smaller print or longer instructions do not create useful difficulty.
Now compare the method on Hard Crossword. Keep the goal—replace trial-and-error with a disciplined elimination ladder that finds the next justified move in a hard Sudoku and turns advanced patterns into simpler follow-up placements—but change only the difficulty or theme, so the comparison shows whether the routine transfers.
For intermediate Sudoku players who can solve easy and medium grids but stall when obvious singles disappear, adjust the amount of material, available time or input method before removing the reasoning step. Assistance should make the evidence reachable without supplying the result.
Common mistakes and precise recovery actions
Watch for this first failure in How to Solve Hard Sudoku Without Guessing: guessing between two candidates simply because the grid has stopped yielding obvious placements. Stop, restore one cell together with its row, column and 3×3 box and repeat this action: validate every candidate note and exhaust naked and hidden singles first, because an advanced pattern built on stale notes is invalid and a missed single wastes the strongest information already available.
A second risk is searching for X-Wings or other advanced patterns before candidates are complete and simpler locked-candidate or pair eliminations have been exhausted. Compare the current work with the digits already present in the same row, column and box, together with the candidates those digits eliminate; keep only decisions that the evidence supports.
If you notice deleting candidates from cells that do not share the exact unit or row-column relationship that proves the technique, return to this method: inspect rows, columns and boxes for naked or hidden pairs and triples, treating the reserved digits as a set and eliminating them only from other cells in the exact unit that proves the subset. Record the corrected result before touching any later answer.
When leaving old candidate marks in place after a confirmed digit changes its row, column and box peers occurs, use this recovery procedure: remove the last unsupported digit, restore candidates in its row, column and box, and resume from the most recent proven placement. Continue only when the progress measure changes for a stated reason.
Prevent the final failure - finding one advanced elimination and continuing to hunt advanced patterns without rescanning for the new single or hidden single it may have created - by completing this action: after every successful elimination return immediately to singles, locked candidates and pairs before searching for another advanced pattern, because one difficult deduction often creates a chain of much easier moves. Then run the verification for how to solve hard sudoku: scan every row, column and box for duplicates, then compare the finished grid with the recorded solution.
Build a checklist for How to Solve Hard Sudoku Without Guessing
Write the How to Solve Hard Sudoku Without Guessing goal first: replace trial-and-error with a disciplined elimination ladder that finds the next justified move in a hard Sudoku and turns advanced patterns into simpler follow-up placements. Under it, copy this opening action: validate every candidate note and exhaust naked and hidden singles first, because an advanced pattern built on stale notes is invalid and a missed single wastes the strongest information already available. Leave space for the result, not merely a tick box.
Add the second and third checks in order: scan each three-by-three box for locked candidates, including pointing and claiming relationships, and remove a digit from peers only when its remaining positions are confined to the required shared row or column; then inspect rows, columns and boxes for naked or hidden pairs and triples, treating the reserved digits as a set and eliminating them only from other cells in the exact unit that proves the subset. Beside both, print the record rule: place a large digit only when the three units rule out every alternative; keep candidates small.
Reserve a separate line for the hard-area pass: when subset logic stops producing eliminations, scan one digit at a time for larger alignment patterns such as an X-Wing, verifying the matching rows and columns before deleting any candidate outside the corners. Name the exact unit inspected so a later correction does not erase unrelated progress.
End the checklist with this action: after every successful elimination return immediately to singles, locked candidates and pairs before searching for another advanced pattern, because one difficult deduction often creates a chain of much easier moves. Follow it immediately with the verification statement: scan every row, column and box for duplicates, then compare the finished grid with the recorded solution.
Test the checklist against the worked case - after singles dry up, a box confines candidate 6 to two cells on the same row; eliminating 6 from the rest of that row reveals a naked pair in a neighboring box, which removes another candidate and leaves one cell with a single legal digit without any trial placement. Rewrite any item that still needs the full article to explain what object to inspect or when to stop.
- Open with: validate every candidate note and exhaust naked and hidden singles first, because an advanced pattern built on stale notes is invalid and a missed single wastes the strongest information already available.
- Develop with: scan each three-by-three box for locked candidates, including pointing and claiming relationships, and remove a digit from peers only when its remaining positions are confined to the required shared row or column.
- Discriminate with: inspect rows, columns and boxes for naked or hidden pairs and triples, treating the reserved digits as a set and eliminating them only from other cells in the exact unit that proves the subset.
- Resolve with: when subset logic stops producing eliminations, scan one digit at a time for larger alignment patterns such as an X-Wing, verifying the matching rows and columns before deleting any candidate outside the corners.
- Close with: after every successful elimination return immediately to singles, locked candidates and pairs before searching for another advanced pattern, because one difficult deduction often creates a chain of much easier moves.
Teaching, family and group use
When demonstrating How to Solve Hard Sudoku Without Guessing, model one complete unit: one cell together with its row, column and 3×3 box. Say which evidence matters, perform this action - validate every candidate note and exhaust naked and hidden singles first, because an advanced pattern built on stale notes is invalid and a missed single wastes the strongest information already available - and stop after the result is recorded.
For shared use, organise participation this way: one solver proposes a digit while the other names the row, column or box that proves it. Rotate responsibility after a small milestone so one person does not make and approve every decision.
If the step in “Teaching, family and group use” is still unclear, continue with How to Play Sudoku: A Beginner’s Guide. It approaches the same puzzle format from a different decision point before you need to reveal an answer.
If intermediate Sudoku players who can solve easy and medium grids but stall when obvious singles disappear need help, ask what has been ruled out and which method comes next. Point back to inspect rows, columns and boxes for naked or hidden pairs and triples, treating the reserved digits as a set and eliminating them only from other cells in the exact unit that proves the subset rather than revealing the solution.
At the end, ask which action changed the most information. Record one adjustment for the next sudoku page and keep private performance notes off public leaderboards.
A focused 15-minute practice routine
Minutes 0-3 for How to Solve Hard Sudoku Without Guessing: prepare a hard Sudoku with accurate givens, complete candidate notes, an erasable or reversible input method and enough time to scan the full grid systematically instead of guessing at one crowded cell. State the goal to replace trial-and-error with a disciplined elimination ladder that finds the next justified move in a hard Sudoku and turns advanced patterns into simpler follow-up placements, then identify the first one cell together with its row, column and 3×3 box you will inspect.
Minutes 3-7 for how to solve hard sudoku: complete validate every candidate note and exhaust naked and hidden singles first, because an advanced pattern built on stale notes is invalid and a missed single wastes the strongest information already available, followed by scan each three-by-three box for locked candidates, including pointing and claiming relationships, and remove a digit from peers only when its remaining positions are confined to the required shared row or column. Record both outcomes using this rule: place a large digit only when the three units rule out every alternative; keep candidates small.
Minutes 7-12: complete this action on the least certain result: inspect rows, columns and boxes for naked or hidden pairs and triples, treating the reserved digits as a set and eliminating them only from other cells in the exact unit that proves the subset. If the evidence supports a next move, continue with when subset logic stops producing eliminations, scan one digit at a time for larger alignment patterns such as an X-Wing, verifying the matching rows and columns before deleting any candidate outside the corners; otherwise keep the uncertainty visible.
Minutes 12-15: complete after every successful elimination return immediately to singles, locked candidates and pairs before searching for another advanced pattern, because one difficult deduction often creates a chain of much easier moves. End the sudoku practice by checking that scan every row, column and box for duplicates, then compare the finished grid with the recorded solution, even when the full page remains unfinished.
Print, screen and accessibility choices
To print How to Solve Hard Sudoku Without Guessing, follow this format rule: write candidates in consistent miniature positions and erase obsolete notes before they become clutter. Test one page at actual size and inspect the working area before producing a batch.
To use how to solve hard sudoku online, follow this screen rule: select a cell, use notes for candidates and recheck highlighted peers after a placement. Verify keyboard, touch and mouse behaviour at the zoom level the player needs.
Accessibility support for intermediate Sudoku players who can solve easy and medium grids but stall when obvious singles disappear should preserve the evidence - the digits already present in the same row, column and box, together with the candidates those digits eliminate - while changing size, contrast, input method or session length. Support access without silently supplying the answer.
Evaluate proof quality
A strong solve log names each technique, its cells or lines, candidates removed and the simple consequence that follows.
Repeat a hard puzzle segment from a saved state without the previous log. The same evidence should support the same elimination.
At completion, validate all units and review whether every placed digit traces back to a single, valid pattern or given.
Test the skill on a fresh puzzle
Open one linked sudoku page and write down two actions before starting: validate every candidate note and exhaust naked and hidden singles first, because an advanced pattern built on stale notes is invalid and a missed single wastes the strongest information already available, followed by scan each three-by-three box for locked candidates, including pointing and claiming relationships, and remove a digit from peers only when its remaining positions are confined to the required shared row or column. Put How to Solve Hard Sudoku Without Guessing aside during the attempt.
At the first uncertain point, use this method without prompting: inspect rows, columns and boxes for naked or hidden pairs and triples, treating the reserved digits as a set and eliminating them only from other cells in the exact unit that proves the subset. Compare one confirmed result with one unresolved result and name the evidence separating them.
Complete the fresh attempt by doing this: after every successful elimination return immediately to singles, locked candidates and pairs before searching for another advanced pattern, because one difficult deduction often creates a chain of much easier moves. Run the same final check - scan every row, column and box for duplicates, then compare the finished grid with the recorded solution - and record one specific adjustment for the next page.
Frequently asked questions
What should I do first in How to Solve Hard Sudoku Without Guessing?
Begin with the catalogued opening action for how to solve hard sudoku: validate every candidate note and exhaust naked and hidden singles first, because an advanced pattern built on stale notes is invalid and a missed single wastes the strongest information already available. Apply it to one cell together with its row, column and 3×3 box and record the result before moving to scan each three-by-three box for locked candidates, including pointing and claiming relationships, and remove a digit from peers only when its remaining positions are confined to the required shared row or column.
How can I tell whether my how to solve hard sudoku method is producing real progress?
For this sudoku task, use the progress test 'count justified placements and cleaned candidate sets rather than elapsed time alone'. A new mark counts only when it can be connected to the digits already present in the same row, column and box, together with the candidates those digits eliminate.
What should I do if I notice guessing between two candidates simply because the grid has stopped yielding obvious placements?
Stop at the first affected unit and use the format-specific recovery: remove the last unsupported digit, restore candidates in its row, column and box, and resume from the most recent proven placement. Resume How to Solve Hard Sudoku Without Guessing with inspect rows, columns and boxes for naked or hidden pairs and triples, treating the reserved digits as a set and eliminating them only from other cells in the exact unit that proves the subset instead of repeating the unsupported move.
When is it appropriate to check the answer for How to Solve Hard Sudoku Without Guessing?
Check after completing this final action: after every successful elimination return immediately to singles, locked candidates and pairs before searching for another advanced pattern, because one difficult deduction often creates a chain of much easier moves. Before opening the answer, write the exact unresolved point and test whether scan every row, column and box for duplicates, then compare the finished grid with the recorded solution.
How can I make this sudoku practice more accessible?
Change size, spacing, session length or input method while preserving the digits already present in the same row, column and box, together with the candidates those digits eliminate. On paper, write candidates in consistent miniature positions and erase obsolete notes before they become clutter. On screen, select a cell, use notes for candidates and recheck highlighted peers after a placement.
What should I practise after How to Solve Hard Sudoku Without Guessing?
Choose a nearby how to solve hard sudoku page and repeat two actions without reopening the article: validate every candidate note and exhaust naked and hidden singles first, because an advanced pattern built on stale notes is invalid and a missed single wastes the strongest information already available; then inspect rows, columns and boxes for naked or hidden pairs and triples, treating the reserved digits as a set and eliminating them only from other cells in the exact unit that proves the subset. Finish by checking that scan every row, column and box for duplicates, then compare the finished grid with the recorded solution.